0%

扩展方法

如果想要对现有的类添加新的方法,但是又不太可能去修改原有类的时候,我们就可以通过扩展方法进行扩展(当然,也有其他的方式可以达到目的),java原生是不支持扩展方法的,熟悉其他语言的同学可能知道,例如:C#、go、kotlin等都是原生支持扩展方法的,那如果想在java中也要实现扩展方法,比如:“hello world”.print();实现 这样的功能,该如何做呢?

Manifold介绍

Manifold是一个java的编译插件,其中包含了很多的功能,其中扩展方法就是其中之一,更多的功能介绍可以参考官网以及源代码

接下来我们简单地通过代码的方式看看manifold是如何实现扩展方法的。

  • 首先,添加依赖,参考pom.xml文件如下
1
2
3
4
5
6
7
8
9
10
11
12
13
14
15
16
17
18
19
20
21
22
23
24
25
26
27
28
29
30
31
32
33
34
35
36
37
38
39
40
41
42
43
44
45
46
47
48
49
50
51
<?xml version="1.0" encoding="UTF-8"?>
<project xmlns="http://maven.apache.org/POM/4.0.0" xmlns:xsi="http://www.w3.org/2001/XMLSchema-instance" xsi:schemaLocation="http://maven.apache.org/POM/4.0.0 http://maven.apache.org/maven-v4_0_0.xsd">
<modelVersion>4.0.0</modelVersion>

<groupId>com.example</groupId>
<artifactId>my-ext-app</artifactId>
<version>0.1-SNAPSHOT</version>

<name>My Java Extension App</name>

<properties>
<!-- set latest manifold version here -->
<manifold.version>2022.1.14</manifold.version>
</properties>

<dependencies>
<dependency>
<groupId>systems.manifold</groupId>
<artifactId>manifold-ext-rt</artifactId>
<version>${manifold.version}</version>
</dependency>
</dependencies>

<!--Add the -Xplugin:Manifold argument for the javac compiler-->
<build>
<plugins>
<plugin>
<groupId>org.apache.maven.plugins</groupId>
<artifactId>maven-compiler-plugin</artifactId>
<version>3.8.0</version>
<configuration>
<source>11</source>
<target>11</target>
<encoding>UTF-8</encoding>
<compilerArgs>
<!-- Configure manifold plugin-->
<arg>-Xplugin:Manifold</arg>
</compilerArgs>
<!-- Add the processor path for the plugin -->
<annotationProcessorPaths>
<path>
<groupId>systems.manifold</groupId>
<artifactId>manifold-ext</artifactId>
<version>${manifold.version}</version>
</path>
</annotationProcessorPaths>
</configuration>
</plugin>
</plugins>
</build>
</project>
  • 定义一个类,例如:StringExtension
1
2
3
4
5
6
7
8
9
10
11
12
13
14
15
16
17
18
19
20
21
package extensions.java.lang.String;

import manifold.ext.rt.api.Extension;
import manifold.ext.rt.api.This;

@Extension
public class StringExtension {
public static void print(@This String thiz) {
System.out.println(thiz);
}

@Extension
public static String lineSeparator() {
return System.lineSeparator();
}

@Extension
public static String sayHello(String name) {
return "hello " + name;
}
}

特别说明下:扩展的包的定义是有一定的限制,所有的扩展类必须是在extensions包下面定义,后面加上要扩展的类的包,例如上代码:extensions.java.lang.String,在java9以及后续的版本中,我们还可以加上自己的模块名称,比如:com.test,那么扩展的包名就可以是:com.test.extensions.java.lang.String,在java8中extensions必须是根。

扩展方法所在的类必须添加@Extension注解,扩展方法必须是静态的公共方法,而且第一个参数为:@This+扩展的类型+参数名称,如果是静态的扩展方法那么需要在静态方法上面加@Extension注解,参数不再需要@This 进行限定,定义完成之后我们可以通过如下的方式进行调用了

1
2
"hello world".print();
System.out.println(String.sayHello("sherman"));

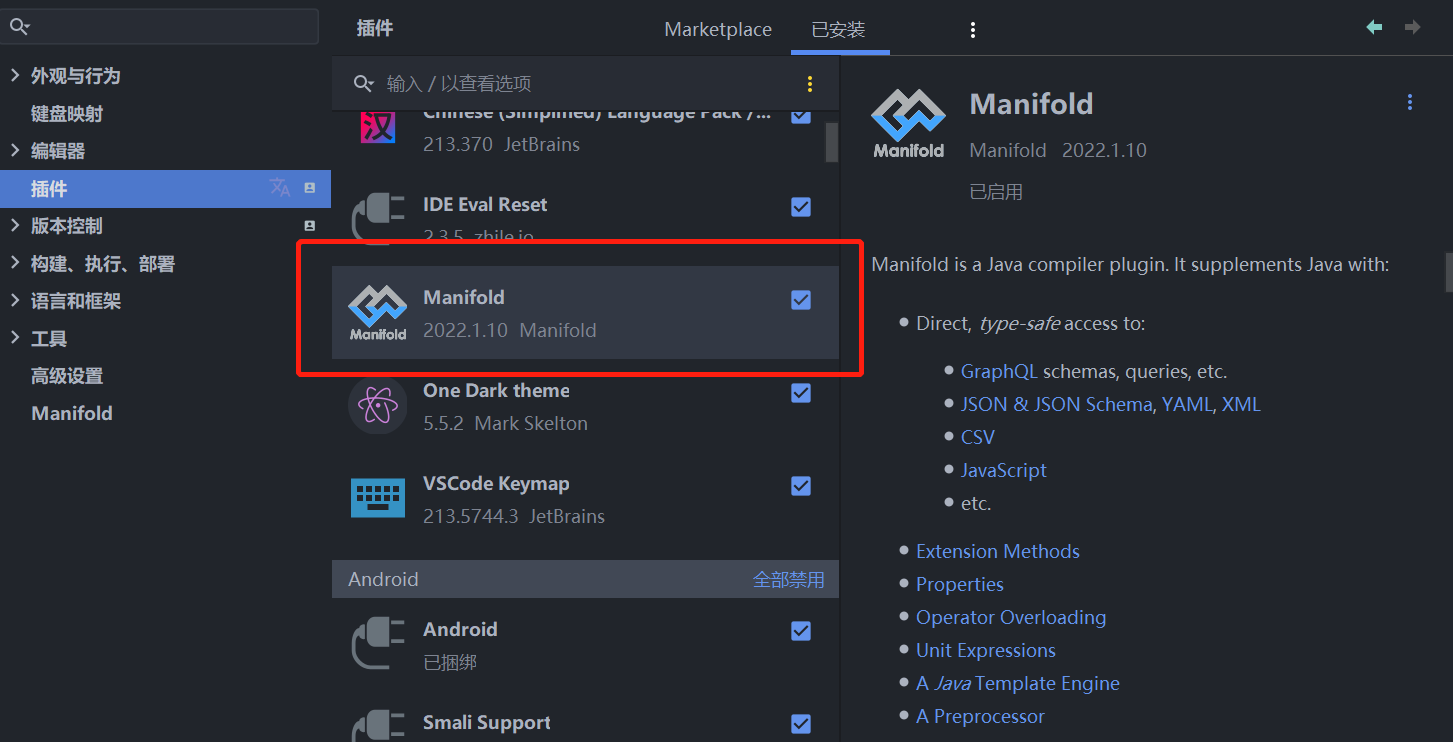
当然,为了更棒的体验,还是要在idea中装一个插件Manifold

image-20220520121202724

其他类型扩展

比如,我想针对Iterable这个类型进行扩展,可以参考如下的代码:

1
2
3
4
5
6
7
8
9
10
11
12
13
14
15
16
17
18
19
20
21
package extensions.java.lang.Iterable;

import manifold.ext.rt.api.Extension;
import manifold.ext.rt.api.Self;
import manifold.ext.rt.api.This;

import java.util.NoSuchElementException;
import java.util.function.Predicate;

@Extension
public class CollectionExtension {
public static <T> T first(@This Iterable<T> thiz, Predicate<T> predicate) {
for (T element : thiz) {
if (predicate.test(element)) {
return element;
}
}

throw new NoSuchElementException();
}
}
1
2
3
4
5
6
7
List<String> list = new ArrayList<>();
list.add("one");
list.add("two");
list.add("three");
Predicate<String> getFirst = s -> Objects.equals(s, "one");
String first = list.first(getFirst);
System.out.println(first);

Manifold已经为我们提供了一些扩展

  • Collections

    定义在manifold-io模块中,扩展了以下的类

    • java.io.BufferedReader
    • java.io.File
    • java.io.InputStream
    • java.io.OutputStream
    • java.io.Reader
    • java.io.Writer
  • Text

    定义在manifold-text模块中,扩展了以下的类

    • java.lang.CharSequence
    • java.lang.String
  • I/O

    定义在manifold-io模块中,扩展了以下的类

    • java.io.BufferedReader
    • java.io.File
    • java.io.InputStream
    • java.io.OutputStream
    • java.io.Reader
    • java.io.Writer
  • Web/JSON

    定义在manifold-json模块中,扩展了以下的类

    • java.net.URL
    • manifold.rt.api.Bindings

我们也可以将自己的扩展以包的形式提供出去,具体注意事项可以参考官方的文档。

应用场景

有的时候,我们需要查看某一段代码的性能如何,最为简单的方式,可以通过计算该段代码执行的耗时,来进行简单的判断,那么我们在java中可以通过以下几种方式获取程序的执行耗时。

代码示例

  1. 通过 System.currentTimeMillis()方法可以获取当前时间的毫秒数据,那么就可以在开始执行的地方记录一个当前时间的毫秒数值,程序执行结束的时候获取一个当前时间的毫秒数值,取两个时间的差值即为程序的耗时,代码如下:

    1
    2
    3
    4
    5
    6
    7
    8
    9
    10
     /**
    * 通过 <code>System.currentTimeMillis()</code>获取执行的时长
    * @throws InterruptedException
    */
    public void getExecuteTimeByCurrentTimeMillis() throws InterruptedException {
    long start = System.currentTimeMillis();
    Thread.sleep(1000);
    long end = System.currentTimeMillis();
    System.out.println(String.format("Total Time:%d ms", end - start));
    }
  2. 通过System.nanoTime()方法,该方法和System.currentTimeMillis()类似,只是返回的是纳秒。

    1
    2
    3
    4
    5
    6
    7
    8
    9
    10
    11
    /**
    * 通过<code>System.nanoTime()</code>获取执行时长,该方法返回的单位是纳秒
    *
    * @throws InterruptedException
    */
    public void getExecuteTimeByNanoTime() throws InterruptedException {
    long start = System.nanoTime();
    Thread.sleep(1000);
    long end = System.nanoTime();
    System.out.println(String.format("Total Time:%d ms", (end - start) / 1000000));
    }
  3. 通过java.util.Date初始化一个时间类型的对象,在程序的开始地方用于表示开始时间,程序结束时再初始化一个时间对象,然后计算两个时间的差值,也就是执行的时长。

    1
    2
    3
    4
    5
    6
    7
    8
    9
    10
    11
    /**
    * 通过java.util.Date初始化开始和结束时间,计算两个时间的差值得出执行时间
    *
    * @throws InterruptedException
    */
    public void getExecuteTimeByDate() throws InterruptedException {
    Date startDate = new Date();
    Thread.sleep(1000);
    Date endDate = new Date();
    System.out.println(String.format("Total time:%d ms", endDate.getTime() - startDate.getTime()));
    }
  4. 通过commons.lang3中的StopWatch,需要引入如下的依赖

    1
    2
    3
    4
    5
    <dependency>
    <groupId>org.apache.commons</groupId>
    <artifactId>commons-lang3</artifactId>
    <version>3.12.0</version>
    </dependency>
    1
    2
    3
    4
    5
    6
    7
    8
    9
    10
    11
    12
    /**
    * 通过引入apache 的 commons.lang3包,使用StopWatch获取执行时间
    *
    * @throws InterruptedException
    */
    public void getExecuteByStopWatch1() throws InterruptedException {
    StopWatch stopWatch = new StopWatch();
    stopWatch.start();
    Thread.sleep(1000);
    stopWatch.stop();
    System.out.println(String.format("Total time:%d ms", stopWatch.getTime()));
    }
  5. 通过com.google.guavaStopwatch,需要引入如下的依赖

    1
    2
    3
    4
    5
    6
    <dependency>
    <groupId>com.google.guava</groupId>
    <artifactId>guava</artifactId>
    <version>31.1-jre</version>
    <!-- <type>bundle</type> -->
    </dependency>
    1
    2
    3
    4
    5
    6
    7
    8
    9
    10
    /**
    * 引入com.google.guava中的Guava包,使用Stopwatch获取执行时间
    * @throws InterruptedException
    */
    public void getExecuteByStopWatch2() throws InterruptedException {
    Stopwatch stopwatch = Stopwatch.createStarted();
    Thread.sleep(1000);
    stopwatch.stop();
    System.out.println(String.format("Total time:%d ms", stopwatch.elapsed(TimeUnit.MILLISECONDS)));
    }
  6. 通过spring中的StopWatch获取执行时间,我这里是使用的spring boot搭建的控制台程序

    1
    2
    3
    4
    5
    6
    7
    8
    9
    10
    11
    12
    /**
    * 通过spring中的StopWatch获取执行时间
    * @throws InterruptedException
    */
    public void getExecuteByStopWatch3() throws InterruptedException {
    // TODO Auto-generated method stub
    org.springframework.util.StopWatch stopWatch = new org.springframework.util.StopWatch();
    stopWatch.start();
    Thread.sleep(1000);
    stopWatch.stop();
    System.out.println(String.format("Total time:%d ms", stopWatch.getTotalTimeMillis()));
    }

通过以上6种方式都可以获取到程序的执行耗时,不知道大家是否还有其他的方式呢?欢迎在评论区讨论。

创建项目

首先创建一个普通的maven项目,方式有很多种,这里就不再详细阐述,我这里通过命令行的方式已经创建了一个maven项目,添加依赖,可以通过两种方式:

  1. 直接添加 spring-boot-starter-parent 这个作为parent节点如下所示:

    1
    2
    3
    4
    5
    <parent>
    <groupId>org.springframework.boot</groupId>
    <artifactId>spring-boot-starter-parent</artifactId>
    <version>2.6.7</version>
    </parent>

    然后添加spring-boot-starter的依赖

    1
    2
    3
    4
    <dependency>
    <groupId>org.springframework.boot</groupId>
    <artifactId>spring-boot-starter</artifactId>
    </dependency>

    因为上面parent指定了版本,可以在依赖中直接继承上面的版本号

  2. 不用spring-boot-starter-parent 这个,直接添加spring-boot-starter依赖,并指定版本号

    1
    2
    3
    4
    5
    <dependency>
    <groupId>org.springframework.boot</groupId>
    <artifactId>spring-boot-starter</artifactId>
    <version>2.6.7</version>
    </dependency>

    当然还需要添加一个插件

    1
    2
    3
    4
    5
    6
    7
    8
    9
    10
    11
    12
    <plugin>
    <groupId>org.springframework.boot</groupId>
    <artifactId>spring-boot-maven-plugin</artifactId>
    <version>2.6.7</version>
    <executions>
    <execution>
    <goals>
    <goal>repackage</goal>
    </goals>
    </execution>
    </executions>
    </plugin>

实现接口

添加完了依赖之后,我们需要CommandLineRunner接口,并重写run方法,代码如下

1
2
3
4
5
6
7
8
9
10
11
12
13
14
15
16
17
18
19
20
21
22
23
24
25
26
27
28
29
30
31
32
package com.sherman;

import com.sherman.service.HelloWorldService;

import org.springframework.beans.factory.annotation.Autowired;
import org.springframework.boot.CommandLineRunner;
import org.springframework.boot.SpringApplication;
import org.springframework.boot.autoconfigure.SpringBootApplication;

/**
* Hello world!
*
*/
@SpringBootApplication
public class App implements CommandLineRunner
{

@Autowired
private HelloWorldService helloWorldService;

public static void main( String[] args )
{
SpringApplication.run(App.class, args);
System.out.println( "Hello World!" );
}

@Override
public void run(String... args) throws Exception {
System.out.println("程序的真正入口地址");
helloWorldService.sayHello();
}
}

接下来,我们定义一个服务

1
2
3
4
5
6
7
8
package com.sherman.service;

/**
* HelloWorldService
*/
public interface HelloWorldService {
void sayHello();
}
1
2
3
4
5
6
7
8
9
10
11
12
13
14
15
16
17
package com.sherman.service.impl;

import com.sherman.service.HelloWorldService;

import org.springframework.stereotype.Service;

/**
* HelloWorldServiceImpl
*/
@Service
public class HelloWorldServiceImpl implements HelloWorldService {

@Override
public void sayHello() {
System.out.println("hello world");
}
}

这样我们就可以在控制台程序中使用springboot的功能,进行配置,依赖注入等强悍的功能,非常方便,大家也来试试吧

题外话

再多说一点有关spring-boot-starter-parent 的知识,我们可以看到,引入的时候是通过parent节点进行引入的,说明spring-boot-starter-parent是作为父项目进行引入,这样当前的项目就可以继承spring-boot-starter-parent相关的配置,我们可以进入到spring-boot-starter-parent定义中去,查看具体的配置内容,截取部分内容看看:

1
2
3
4
5
6
7
8
9
10
11
12
13
14
15
16
17
18
<modelVersion>4.0.0</modelVersion>
<parent>
<groupId>org.springframework.boot</groupId>
<artifactId>spring-boot-dependencies</artifactId>
<version>2.6.7</version>
</parent>
<artifactId>spring-boot-starter-parent</artifactId>
<packaging>pom</packaging>
<name>spring-boot-starter-parent</name>
<description>Parent pom providing dependency and plugin management for applications built with Maven</description>
<properties>
<java.version>1.8</java.version>
<resource.delimiter>@</resource.delimiter>
<maven.compiler.source>${java.version}</maven.compiler.source>
<maven.compiler.target>${java.version}</maven.compiler.target>
<project.build.sourceEncoding>UTF-8</project.build.sourceEncoding>
<project.reporting.outputEncoding>UTF-8</project.reporting.outputEncoding>
</properties>

看几个关键的东西 <packaging>pom</packaging> 这个是指打包的类型为pom,父类型就必须指定为pom,默认的是jar,作为内部调用或者后台服务使用使用jar类型,如果是在tomcat或者jetty等容器中运行可以指定为war类型,当然还有其他的类型(如:maven-plugin、ejb、ear、par、rar等)。

还可以看到

1
2
3
4
5
<parent>
<groupId>org.springframework.boot</groupId>
<artifactId>spring-boot-dependencies</artifactId>
<version>2.6.7</version>
</parent>

spring-boot-starter-parent的父项目为spring-boot-dependencies,再进入到spring-boot-dependencies 定义中去,首先spring-boot-dependencies的打包类型也是pom,还有一个比较关键的是dependencyManagement

1
2
3
4
5
6
7
8
9
10
11
12
13
14
15
16
17
18
<dependencyManagement>
<dependencies>
<dependency>
<groupId>org.apache.activemq</groupId>
<artifactId>activemq-amqp</artifactId>
<version>${activemq.version}</version>
</dependency>
<dependency>
<groupId>org.apache.activemq</groupId>
<artifactId>activemq-blueprint</artifactId>
<version>${activemq.version}</version>
</dependency>
<dependency>
<groupId>org.apache.activemq</groupId>
<artifactId>activemq-broker</artifactId>
<version>${activemq.version}</version>
</dependency>
......

截取了部分内容,spring-boot-dependencies内部使用了 dependencyManagement进行依赖的管理,那dependencyManagementdependencies的区别在哪儿呢?dependencyManagement包裹的依赖,相当于定义一个可以继承的依赖,但不是必须的,也就是说,子项目要想使用其中定义的依赖,需要在dependencies标签内部显示指定(groupId、artifactId),其中version可以不指定,如果不指定,默认就继承父项目定义的version,如果指定了就覆盖父项目中的版本,使用本地定义的依赖,而父级的是不会引入的。而如果父项目中只是包含了dependencies,那么子项目就会继承所有在dependencies定义的依赖,而子项目也不用再指定具体的依赖。dependencyManagement主要用于统一管理版本。

创建项目

创建springboot项目有很多种方式,可以通过IDE(idea、eclipse等)工具,或者spring initializr,但是本文的重点是通过创建一个普通的maven项目,然后通过添加springboot的相关依赖去构建springboot项目,主要是为了让自己对springboot项目有一个大致的了解。创建maven项目可以参考我之前的文章,通过maven命令创建项目,此处不再详细描述

添加依赖

在pom.xml文件加入以下内容

1
2
3
4
5
<parent>
<groupId>org.springframework.boot</groupId>
<artifactId>spring-boot-starter-parent</artifactId>
<version>2.6.7</version>
</parent>

这就是Spring Boot的父级依赖,加入之后项目就变成了Spring Boot项目。spring-boot-starter-parent是一个特殊的starter,它用来提供相关的maven默认依赖。之后再引入。其他的依赖时,可以不用指定version标签。接下我们引入web应用相关的依赖。

1
2
3
4
<dependency>
<groupId>org.springframework.boot</groupId>
<artifactId>spring-boot-starter-web</artifactId>
</dependency>

测试验证

修改main方法,加入@SpringBootApplication注解

1
2
3
4
5
6
7
8
9
10
11
package com.sherman.demo.SpringBoot;

import org.springframework.boot.SpringApplication;
import org.springframework.boot.autoconfigure.SpringBootApplication;

@SpringBootApplication
public class SpringBootDmeo {
public static void main(String[] args) {
SpringApplication.run(SpringBootDmeo.class, args);
}
}

添加一个controller,实现一个简单的api接口

1
2
3
4
5
6
7
8
9
10
11
12
13
package com.sherman.demo.SpringBoot.Controllers;

import org.springframework.web.bind.annotation.RequestMapping;
import org.springframework.web.bind.annotation.RestController;

@RestController
public class HelloWorldController {

@RequestMapping("/")
public String sayHello(){
return "Hello World";
}
}

将程序运行起来,在浏览器中输入localhost:8080(默认端口:8080),可以看到输出接口:Hello World,至此,springboot项目已经成功运行起来了。

使用场景

String、StringBuffer、StringBuilder都可以应用于字符串的处理,但是在内部实现上还是有区别的。

  • 在String内部可以发现有这样的代码private final char value[];是用来存储字符用的,final修饰的就表明一旦初始化就无法更改,那么也就导致对String的操作始终都是产生新的String对象,这样的话,频繁更改String字符串,会导致大量的内存分配,从而给GC造成很大压力,影响程序的性能
  • StringBuffer/StringBuilder内部默认都是创建容量为16的char[] value;数组,当使用append追加字符串的时候,会首先判断添加的字符串长度是否已经超过数组剩余的长度,如果没有则直接在末尾追加,并计算剩余的可用长度,如果超过,则会进行扩容的操作,重新计算新的长度(int newCapacity = (value.length << 1) + 2;)并创建一个新的char[]数组,将原来的数组copy过去(value = Arrays.copyOf(value,newCapacity(minimumCapacity));),通过源代码分析,可以发现StringBuffer与StringBuilder本质上的区别就是:StringBuffer支持多线程的,内部使用同步操作的机制,而StringBuilder是线程不安全的,只能使用在单线程的场景

通过对比分析,我们可以知道如果是字符串频繁的修改操作,建议使用StringBuffer/StringBuilder,而如果是在多线程的应用场景的话,选择StringBuffer,单线程就选择StringBuilder,还有一点我们必须要注意,StringBuffer/StringBuilder默认创建的时候指定的容量大小为16,我们可以根据实际的应用场景指定初始化的大小,以避免频繁的扩容操作,从而影响程序的性能

性能比较

我们可以简单地比较一下使用String、StringBuffer与StringBuilder的性能究竟如何,可以通过获取程序的执行时间(当然我们也可以使用jmh-core去更详细地比较相关的性能指标,这个在后续的文章当中专门介绍一下)

定义一个接口StringTestService

1
2
3
4
5
6
7
8
9
10
11
12
13
package com.sherman.service;

public interface StringTestService {
void testString(int loopCount);

void testStringBuffer(int loopCount);

void testStringBuilder(int loopCount);

void testStringBufferBySpecifiedCapacity(int loopCount);

void testStringBuilderBySpecifiedCapacity(int loopCount);
}

实现接口:

1
2
3
4
5
6
7
8
9
10
11
12
13
14
15
16
17
18
19
20
21
22
23
24
25
26
27
28
29
30
31
32
33
34
35
36
37
38
39
40
41
42
43
44
45
46
47
48
49
50
51
52
53
54
55
56
57
58
59
60
61
62
63
64
package com.sherman.service.impl;

import com.sherman.service.StringTestService;
import org.springframework.stereotype.Service;

@Service
public class StringTestServiceImpl implements StringTestService {
@Override
public void testString(int loopCount) {
long start = System.currentTimeMillis();
String str = "";
for (int i = 0; i < loopCount; i++) {
str += String.format("loop:%s", i);
}
long end = System.currentTimeMillis();
System.out.println(String.format("testString spend total time: %d ms", end - start));
}

@Override
public void testStringBuffer(int loopCount) {
long start = System.currentTimeMillis();
StringBuffer sb = new StringBuffer();
for (int i = 0; i < loopCount; i++) {
sb.append(String.format("loop:%s", i));
}
long end = System.currentTimeMillis();
System.out.println(String.format("testStringBuffer spend total time: %d ms", end - start));
}

@Override
public void testStringBuilder(int loopCount) {
long start = System.currentTimeMillis();
StringBuilder sb = new StringBuilder();
for (int i = 0; i < loopCount; i++) {
sb.append(String.format("loop:%s", i));
}

long end = System.currentTimeMillis();
System.out.println(String.format("testStringBuilder spend total time: %d ms", end - start));
}

@Override
public void testStringBufferBySpecifiedCapacity(int loopCount) {
long start = System.currentTimeMillis();
StringBuffer sb = new StringBuffer(loopCount);
for (int i = 0; i < loopCount; i++) {
sb.append(String.format("loop:%s", i));
}
long end = System.currentTimeMillis();
System.out.println(String.format("testStringBufferBySpecifiedCapacity spend total time: %d ms", end - start));
}

@Override
public void testStringBuilderBySpecifiedCapacity(int loopCount) {
long start = System.currentTimeMillis();
StringBuilder sb = new StringBuilder(loopCount);
for (int i = 0; i < loopCount; i++) {
sb.append(String.format("loop:%s", i));
}

long end = System.currentTimeMillis();
System.out.println(String.format("testStringBuilderBySpecifiedCapacity spend total time: %d ms", end - start));
}
}

可以发现实现的服务里面有很多重复的代码,针对这种情况,我们可以使用aop的方式进行重构,有兴趣的同学也可以自己去尝试一下,我也打算放在单独的文章当中介绍如何通过aop的方式实现日志的记录。暂且先忍受一下,重点是比较执行时间。

1
2
3
4
5
6
7
8
9
10
11
12
13
14
15
16
17
18
19
20
21
22
23
24
25
26
27
28
29
30
31
32
33
34
35
package com.sherman;

import com.sherman.service.StringTestService;
import org.springframework.beans.factory.annotation.Autowired;
import org.springframework.boot.CommandLineRunner;
import org.springframework.boot.SpringApplication;
import org.springframework.boot.autoconfigure.SpringBootApplication;

/**
* Hello world!
*
*/
@SpringBootApplication
public class App implements CommandLineRunner
{
@Autowired
private StringTestService stringTestService;

public static void main( String[] args )
{
SpringApplication.run(App.class, args);
System.out.println( "Hello World!" );
}

@Override
public void run(String... args) throws Exception {
System.out.println("程序的真正入口地址");
int loop = 1000000;
stringTestService.testString(loop);
stringTestService.testStringBuffer(loop);
stringTestService.testStringBuilder(loop);
stringTestService.testStringBufferBySpecifiedCapacity(loop);
stringTestService.testStringBuilderBySpecifiedCapacity(loop);}
}

程序的执行结果如下:

应用场景

最近碰到一个问题,就是想把json字符串中的字段名称都改成首字母小写,当然这个json是非常大的,手动改不理智,那有没有什么办法通过什么方式直接将json字符串的首字母都改成小写的呢?一开始是想通过Newtonsoft.Json.dll这个类库,直接反序列化为动态的类(dynamic),然后重新序列化成json字符串时指定:ContractResolver = new CamelCasePropertyNamesContractResolver(),但是还是行不通。如果我们有事先定义好的实体类,再序列化的时候通过上面的设置是可以输出首字母小写的json字符串,基于这个考虑,是否可以通过原json字符串动态生成实体类,再通过反序列化成该实体类,最后把得到的对象再序列化成json字符串,是否可达目的呢。请往下看。

动态生成实体类

  • 创建一个控制台项目:dotnet new console -o JsonToObject

  • 新建一个json文件,里面就是需要转换的json内容

  • 读取json内容,拼接json中涉及到的所有的类的定义

    1
    2
    3
    4
    5
    6
    7
    8
    9
    10
    11
    12
    13
    14
    15
    16
    17
    18
    19
    20
    21
    22
    23
    24
    25
    26
    27
    28
    29
    30
    31
    32
    33
    34
    35
    36
    37
    38
    39
    40
    41
    42
    43
    44
    45
    46
    47
    48
    49
    50
    51
    52
    53
    54
    55
    56
    57
    58
    59
    60
    61
    62
    63
    64
    65
    66
    67
    68
    69
    70
    71
    72
    73
    74
    75
    76
    77
    78
    79
    80
    81
    82
    83
    84
    85
    86
    87
    88
    89
    90
    91
    92
    93
    94
    95
    96
    97
    98
    99
    100
    101
    102
    103
    104
    105
    106
    107
    108
    109
    110
    111
    112
    113
    114
    115
    116
    117
    118
    119
    120
    121
    122
    123
    124
    125
    126
    127
    128
    129
    130
    131
    132
    133
    134
    135
    136
    Action<string> Write = Console.WriteLine;
    var jsonString = File.ReadAllText("demo.json");//读取json文件里的内容
    var jObject = JObject.Parse(jsonString);//Newtonsoft.Json中的JObject.Parse转换成json对象

    Dictionary<string, string> classDicts = new Dictionary<string, string>();//key为类名,value为类中的所有属性定义的字符串
    classDicts.Add("Root", GetClassDefinion(jObject));//拼接顶层的类
    foreach (var item in jObject.Properties())
    {
    classDicts.Add(item.Name, GetClassDefinion(item.Value));
    GetClasses(item.Value, classDicts);
    }
    //下面是将所有的类定义完整拼接起来
    StringBuilder sb = new StringBuilder(1024);
    sb.AppendLine("using System;");
    sb.AppendLine("using System.Collections.Generic;");
    sb.AppendLine("namespace JsonToObject");
    sb.AppendLine("{");
    foreach (var item in classDicts)
    {
    sb.Append($"public class {item.Key}" + Environment.NewLine);
    sb.Append("{" + Environment.NewLine);
    sb.Append(item.Value);
    sb.Append("}" + Environment.NewLine);
    }
    sb.AppendLine("}");
    Write(sb.ToString());

    //递归遍历json节点,把需要定义的类存入classes
    void GetClasses(JToken jToken, Dictionary<string, string> classes)
    {
    if (jToken is JValue)
    {
    return;
    }
    var childToken = jToken.First;
    while (childToken != null)
    {
    if (childToken.Type == JTokenType.Property)
    {
    var p = (JProperty)childToken;
    var valueType = p.Value.Type;

    if (valueType == JTokenType.Object)
    {
    classes.Add(p.Name, GetClassDefinion(p.Value));
    GetClasses(p.Value, classes);
    }
    else if (valueType == JTokenType.Array)
    {
    foreach (var item in (JArray)p.Value)
    {
    if (item.Type == JTokenType.Object)
    {
    if (!classes.ContainsKey(p.Name))
    {
    classes.Add(p.Name, GetClassDefinion(item));
    }

    GetClasses(item, classes);
    }
    }
    }
    }

    childToken = childToken.Next;
    }
    }

    //获取类中的所有的属性
    string GetClassDefinion(JToken jToken)
    {
    StringBuilder sb = new(256);
    var subValueToken = jToken.First();
    while (subValueToken != null)
    {
    if (subValueToken.Type == JTokenType.Property)
    {
    var p = (JProperty)subValueToken;
    var valueType = p.Value.Type;
    if (valueType == JTokenType.Object)
    {
    sb.Append("public " + p.Name + " " + p.Name + " {get;set;}" + Environment.NewLine);
    }
    else if (valueType == JTokenType.Array)
    {
    var arr = (JArray)p.Value;
    //a.First

    switch (arr.First().Type)
    {
    case JTokenType.Object:
    sb.Append($"public List<{p.Name}> " + p.Name + " {get;set;}" + Environment.NewLine);
    break;
    case JTokenType.Integer:
    sb.Append($"public List<int> " + p.Name + " {get;set;}" + Environment.NewLine);
    break;
    case JTokenType.Float:
    sb.Append($"public List<float> " + p.Name + " {get;set;}" + Environment.NewLine);
    break;
    case JTokenType.String:
    sb.Append($"public List<string> " + p.Name + " {get;set;}" + Environment.NewLine);
    break;
    case JTokenType.Boolean:
    sb.Append($"public List<bool> " + p.Name + " {get;set;}" + Environment.NewLine);
    break;
    default:
    break;
    }
    }
    else
    {
    switch (valueType)
    {
    case JTokenType.Integer:
    sb.Append($"public int " + p.Name + " {get;set;}" + Environment.NewLine);
    break;
    case JTokenType.Float:
    sb.Append($"public float " + p.Name + " {get;set;}" + Environment.NewLine);
    break;
    case JTokenType.String:
    sb.Append($"public string " + p.Name + " {get;set;}" + Environment.NewLine);
    break;
    case JTokenType.Boolean:
    sb.Append($"public bool " + p.Name + " {get;set;}" + Environment.NewLine);
    break;
    default:
    break;
    }
    }
    }

    subValueToken = subValueToken.Next;
    }

    return sb.ToString();
    }
    • 现在有了类的定义字符串,接下来就可以动态编译成实体类

      1
      2
      3
      4
      5
      6
      7
      8
      9
      10
      11
      12
      13
      14
      15
      16
      17
      18
      19
      20
      21
      22
      23
      24
      25
      26
      27
      28
      29
      30
      31
      32
      33
      34
      35
      36
      37
      38
      39
      40
      41
      42
      43
      44
      45
      46
      47
      48
      49
      50
      51
      52
      53
      54
      55
      56
      Write("Let's compile!");
      Write("Parsing the code into the SyntaxTree");
      SyntaxTree syntaxTree = CSharpSyntaxTree.ParseText(sb.ToString());

      string assemblyName = Path.GetRandomFileName();
      var refPaths = new[] {
      typeof(object).GetTypeInfo().Assembly.Location,
      typeof(Console).GetTypeInfo().Assembly.Location,
      Path.Combine(Path.GetDirectoryName(typeof(System.Runtime.GCSettings).GetTypeInfo().Assembly.Location), "System.Runtime.dll")
      };
      MetadataReference[] references = refPaths.Select(r => MetadataReference.CreateFromFile(r)).ToArray();

      Write("Adding the following references");
      foreach (var r in refPaths)
      Write(r);

      Write("Compiling ...");
      CSharpCompilation compilation = CSharpCompilation.Create(
      assemblyName,
      syntaxTrees: new[] { syntaxTree },
      references: references,
      options: new CSharpCompilationOptions(OutputKind.DynamicallyLinkedLibrary));

      using (var ms = new MemoryStream())
      {
      EmitResult result = compilation.Emit(ms);

      if (!result.Success)
      {
      Write("Compilation failed!");
      IEnumerable<Diagnostic> failures = result.Diagnostics.Where(diagnostic =>
      diagnostic.IsWarningAsError ||
      diagnostic.Severity == DiagnosticSeverity.Error);

      foreach (Diagnostic diagnostic in failures)
      {
      Console.Error.WriteLine("\t{0}: {1}", diagnostic.Id, diagnostic.GetMessage());
      }
      }
      else
      {
      Write("Compilation successful! Now instantiating and executing the code ...");
      ms.Seek(0, SeekOrigin.Begin);

      Assembly assembly = AssemblyLoadContext.Default.LoadFromStream(ms);
      var type = assembly.GetType("JsonToObject.Root");
      var instance = assembly.CreateInstance("JsonToObject.Root");
      //反射获取静态的 DeserializeObject方法
      var deserializeObject = typeof(JsonConvert).GetGenericMethod("DeserializeObject", BindingFlags.Public | BindingFlags.Static, new Type[] { typeof(string), typeof(JsonSerializerSettings) });
      var genericDeserializeObject = deserializeObject.MakeGenericMethod(type);
      //执行反序列化
      var root = genericDeserializeObject.Invoke(null, new object[] { jsonString, null });
      //输出序列化的结果
      Write(JsonConvert.SerializeObject(root, new JsonSerializerSettings { ContractResolver = new CamelCasePropertyNamesContractResolver() }));
      }
      }

      通过反射获取静态方法的扩展

      1
      2
      3
      4
      5
      6
      7
      8
      9
      10
      11
      12
      13
      14
      15
      16
      17
      18
      19
      20
      21
      22
      23
      24
      25
      26
      27
      28
      29
      30
      31
      public static class Extension
      {
      public static MethodInfo GetGenericMethod(this Type targetType, string name, BindingFlags flags, params Type[] parameterTypes)
      {
      var methods = targetType.GetMethods(flags).Where(m => m.Name == name && m.IsGenericMethod);
      var flag = false;
      foreach (MethodInfo method in methods)
      {
      var parameters = method.GetParameters();
      if (parameters.Length != parameterTypes.Length)
      continue;

      for (var i = 0; i < parameters.Length; i++)
      {
      if (parameters[i].ParameterType != parameterTypes[i])
      {
      break;
      }
      if (i == parameters.Length - 1)
      {
      flag = true;
      }
      }
      if (flag)
      {
      return method;
      }
      }
      return null;
      }
      }

      至此,我们已经实现了文章开头说的将json字符串的首字母都变成小写

      总结

      本文主要涉及以下的内容

      • 如何通过json字符串拼接类的定义

      • 如何通过动态编译的方式动态生成类

      • 反射动态调用反序列化的方法

        希望本文能够对大家有所帮助,完整的项目地址可以参考:dynamic_demo项目

免密流程

假设有两台Linux的服务器,A(192.168.240.1)、B(192.168.240.2),现在想通过A服务器免密登录B服务器,那么首先需要将A服务器的SSH公钥复制到B服务器的授权列表文件中(就是authorized_keys文件中)

ssh免密登录

操作流程

  1. 在A服务器上生成密钥:ssh-keygen -t rsa,都采用默认的配置,直接回车即可

  2. 默认生成的密钥是保存在/home/sherman/.ssh目录下(根据自己的情况),直接复制到B服务器上,例如:

    scp id_rsa.pub test@192.168.240.2:/home/test

  3. 在B服务器上以同样的方式生成密钥:ssh-keygen -t rsa,都默认回车,同样在/home/test/.ssh 目录下生成了私钥文件(id_rsa)和公钥文件(id_rsa_pub)

  4. 将A服务器的公钥添加到B服务器的/home/test/.ssh/authorized_keys文件中,如果没有就创建一个:touch authorized_keys 注意:authorized_keys的权限为 -rw——,就是只有test这个用户可以读写,其他的都没有权限

    可以通过命令设置访问权限:chmod 600 authorized_keys

    cat ../id_rsa_pub >> authorized_keys

  5. 在A服务器上输入:ssh test@192.168.240.2 登录成功

maven简介

用官方的描述说:maven是软件项目管理和构建工具,基于项目对象模型(POM)的概念,可以通过一小段描述信息来管理项目的构建,报告和文档

环境准备

  1. 首先得要安装java运行环境
  2. 安装maven

直接点开链接就可以下载,相关的安装步骤不再阐述,可以参考相关的资料进行安装和配置,最终的目的就是为了能够在命令行中运行:java、javac、mvn等命令

创建项目

maven安装成功后,就可以通过mvn命令创建项目

  1. 创建一个文件夹,例如:E:\test

  2. 在E:\test 文件夹下打开命令窗口并输入:mvn archetype:generate (使用的是 maven-archetype-plugin 插件进行项目的创建,如果本地没有,则会自动从网上下载),此命令会有些交互信息,会提示输入groupid、artifactId、packageName等信息,当然我们也可以输入比较完整的命令,进行项目的创建:

    1
    mvn org.apache.maven.plugins:maven-archetype-plugin:3.2.1:creat -DgroupId=com.sherman.demo -DartifactId=demo -DpackageName=com.sherman.demo
  3. 完成后我们就能在E:\test目录下看到demo文件夹,项目结构如下:

    测试代码

    下面我们写点测试代码,在src\main\com\sherman\demo 下创建HelloWorld.java文件,内容如下:

    1
    2
    3
    4
    5
    6
    7
    8
    package com.sherman.demo;

    public class HelloWorld {

    public String sayHello(String name) {
    return name + " say hello world!";
    }
    }

    test\stemain\com\sherman\demo下的AppTest.java内容如下:

    1
    2
    3
    4
    5
    6
    7
    8
    9
    10
    11
    12
    13
    14
    15
    16
    17
    18
    19
    20
    21
    22
    23
    24
    25
    26
    27
    28
    29
    30
    31
    32
    33
    34
    35
    package com.sherman.demo;

    import org.junit.After;
    import org.junit.Assert;
    import org.junit.Before;
    import org.junit.Test;
    /**
    * Unit test for simple App.
    */
    public class AppTest {

    private HelloWorld helloWorld;

    @Before
    public void init() {
    helloWorld = new HelloWorld();
    }

    /**
    * Rigorous Test :-)
    */
    @Test
    public void testSayHello() {
    String name = "sherman";
    String expected = "sherman say hello world!";
    String act = helloWorld.sayHello(name);
    Assert.assertEquals(expected, act);
    }

    @After
    public void destory() {
    helloWorld = null;
    }
    }

    接下我们就编译项目,运行测试用例:

    1
    2
    mvn clean //清理之前的编译安装记录
    mvn compile //编译

    如果运行:mvn compile 报错提示:No compiler is provided in this environment. Perhaps you are running on a JRE rather than a JDK?,检查一下自己的环境变量是否有设置JAVA_HOME=E:\Program Files\Java\jdk1.8.0_321(这个是我的路径,参考自己的实际路径进行添加即可)

    1
    mvn test //运行测试用

    可以看到如下的一些信息

    至此,我们的项目就已经创建完成,可以尽情地书写我们的代码

CompareExchange使用说明

方法签名:public static int CompareExchange(ref int location1, int value, int comparand); location1与comparand进行比较,如果相等,则用value替换location1的值,并返回location1被替换之前的值,例如:

1
2
3
int a = 0;
int b = Interlocked.CompareExchange(ref a, 1, 0);
Console.WriteLine($"a is {a}, b is {b}");

输出结果:a is 1, b is 0

此方法是原子操作,意味着比较和替换值的操作是线程安全的,那么这就可以使用在多线程当中。

CompareExchange示例

1
2
3
4
5
6
7
8
9
10
11
12
13
14
15
16
17
18
19
20
21
22
23
24
25
26
27
28
29
30
31
32
33
34
35
36
37
38
39
40
41
42
43
44
45
46
47
48
49
50
51
52
53
54
55
56
57
58
59
//模拟多线程操作
var calculationHelper = new CalculationHelper();
int ordinaryValue = 0;
ManualResetEventSlim manualResetEvent = new ManualResetEventSlim(false);

Thread thread1 = new Thread(new ThreadStart(Test));
thread1.Name = "线程1";
thread1.Start();

Thread thread2 = new Thread(new ThreadStart(Test));
thread2.Name = "线程2";
thread2.Start();

manualResetEvent.Set();//多个等待的线程可以执行

thread1.Join();
thread2.Join();

Console.WriteLine($"通过线程安全的方式计算结果:{calculationHelper.Total},非线程安全计算出的结果为:{ordinaryValue}");

void Test()
{
manualResetEvent.Wait();//等待信号
for (int i = 1; i <= 10000; i++)
{
ordinaryValue += i;
calculationHelper.AddTotal(i);
}
}

/// <summary>
/// 计算帮助类
/// </summary>
public class CalculationHelper
{
private int total = 0;
public int Total { get { return total; } }

/// <summary>
/// 累加
/// </summary>
/// <param name="value">需要加的值</param>
/// <returns></returns>
public int AddTotal(int value)
{
if (value == 0)
{
return value;
}
int localValue, compuetedValue;
do
{
localValue = total;
compuetedValue = localValue + value;
} while (localValue != Interlocked.CompareExchange(ref total, compuetedValue, localValue));//说明计算成功了

return compuetedValue;
}
}

可以多次运行,观察结果,发现线程安全的方法返回的结果都是固定的,而非线程安全返回的值是变化的,如下是运行两次的结果

通过线程安全的方式计算出的结果:100010000,非线程安全计算出的结果为:97383348

通过线程安全的方式计算出的结果:100010000,非线程安全计算出的结果为:93608564

volatile使用说明

volatile 关键字指示一个字段可以由多个同时执行的线程修改。

出于性能原因,编译器,运行时系统甚至硬件都可能重新排列对存储器位置的读取和写入。声明为 volatile 的字段将从某些类型的优化中排除。不确保从所有执行线程整体来看时所有易失性写入操作均按执行顺序排序。

volatile 关键字可应用于以下类型的字段:

  • 引用类型。
  • 指针类型(在不安全的上下文中)。 请注意,虽然指针本身可以是可变的,但是它指向的对象不能是可变的。 换句话说,不能声明“指向可变对象的指针”。
  • 简单类型,如 sbytebyteshortushortintuintcharfloatbool
  • 具有以下基本类型之一的 enum 类型:bytesbyteshortushortintuint
  • 已知为引用类型的泛型类型参数。
  • IntPtrUIntPtr

其他类型(包括 doublelong)无法标记为 volatile,因为对这些类型的字段的读取和写入不能保证是原子的。 若要保护对这些类型字段的多线程访问,请使用 Interlocked 类成员或使用 lock 语句保护访问权限。

volatile 关键字只能应用于 classstruct 的字段。 不能将局部变量声明为 volatile

示例

1
2
3
4
5
6
7
8
9
10
11
12
13
14
15
16
17
18
19
20
21
22
23
24
25
26
27
28
29
30
31
32
Worker worker = new Worker();
Thread workerThread = new Thread(worker.DoWork);
workerThread.Start();
Console.WriteLine("Main thread: starting worker thread...");

while (!workerThread.IsAlive) ;

Thread.Sleep(500);

worker.RequestStop();

workerThread.Join();
Console.WriteLine("Main thread:worker thread has terminated.");

public class Worker
{
private bool _shouldStop;
public void DoWork()
{
bool work = false;
while (!_shouldStop)
{
work = !work;
}
Console.WriteLine("Work thread: terminating gracefully.");
}

public void RequestStop()
{
_shouldStop = true;
}
}

使用Debug模式运行时,可以看到如下的运行结果:

1
2
3
Main thread: starting worker thread...
Work thread: terminating gracefully.
Main thread:worker thread has terminated.

切换到Release模式运行时,可以看到如下的运行结果:

1
Main thread: starting worker thread...

程序一直结束不了

从运行结果上,我们可以看到编译器对字段 _shouldStop进行优化,Release模式下读取的都是缓存(副本)的值。

问题解决

为了解决上述因为编译器优化而导致的运行结果不稳定的情况,可以通过volatile关键字解决

1
private volatile bool _shouldStop;

只需要用volatile修饰字段_shouldStop即可,再次运行

1
2
3
Main thread: starting worker thread...
Work thread: terminating gracefully.
Main thread:worker thread has terminated.

可以得到我们想要的结果

原理分析

通过linqpad,查看代码生成的IL,左边的是加了volatile关键字修饰的,右边则没有

volatile_1

从生成的IL可以看出,就是多了一个 volatile.指令,该指令的解释:指定当前位于计算堆栈顶部的地址可以是易失的,并且读取该位置的结果不能被缓存,或者对该地址的多个存储区不能被取消。我总结的一句就是,读取的总是最新的值。下面我们也可以通过观察汇编代码的差异得出相同的结论。

通过linqpad,查看生成的汇编代码,左边的是加了volatile关键字修饰的,右边则没有

volatile_2

通过差异发现,加了volatile关键字的,直接比较的是地址指向的内容,用的都是最新的值,而没有加关键字的则是:首先通过movzx指令,将地址指向的内容放入到了ecx寄存器中,后面一直比较的也是ecx寄存器中的值,没有拿到最新的值。这样导致的结果就是我们上面程序运行的结果,循环一直不能结束。

结论:如果存在多线程访问上述类型的字段的话,保险的方式就是通过volatile关键字进行修饰,告诉编译器不需要对该字段进行优化,从而可以每次都能获取到最新的值